Overview:
- You can connect to the virtual machines in an Exadata Database Service on the Cloud @ Customer system by using a Secure Shell (SSH) Connection
- An SSH private key file that corresponds to a public key that is registered in the system
- When you create a VM cluster on your Exadata Database Service on the Cloud @ Customer system, you must specify the public key portion of one or more SSH key pairs
- You can also register extra keys separately after you create the VM cluster
- The public keys are stored in the authorized_keys file at ~/.ssh/authorized_keys. Separate authorized_keys files are located under the home directories of the operating system users
- By default, only the opc user account has an authorized_keys entry and can log in remotely. Do not remove or alter the automatically generated entry in authorized_keys for the opc user
Steps to Add SSH Keys to ExaCC VM Cluster
1. Generate SSH key pairs.
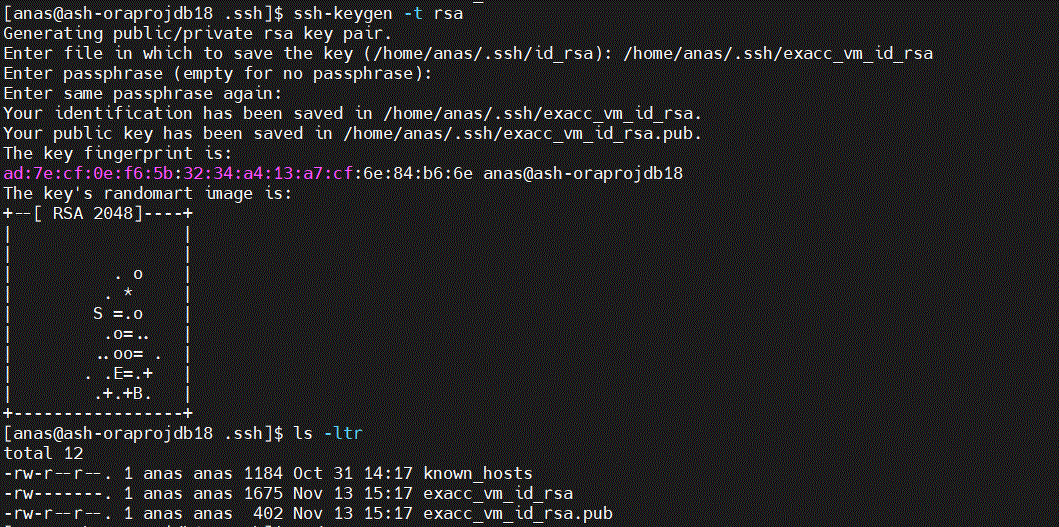
- Connect to the SSH terminal and generate keys using the command “ssh-keygen -t rsa”
The command will generate private and public keys.
- Copy key pairs files to your desktop
2. Sign in to your OCI tenancy where your Exadata Database Service on Cloud @ Customer system is deployed
3. Navigate to “Oracle Database” > “Oracle Exadata Database Service on Cloud@Customer” > “Exadata VM Clusters“
4. Click on your VM Cluster Name
5. On the VM Cluster details page, click the “Add SSH Keys” button
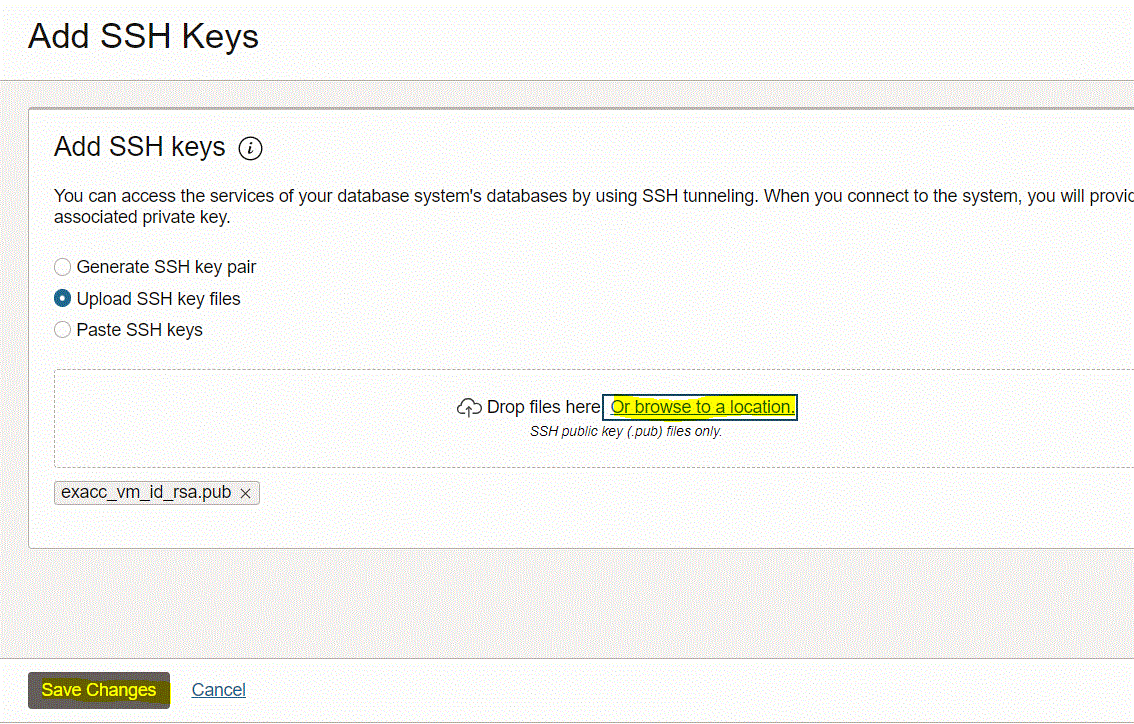
6. On the “Add SSH Keys” page, select “Upload SSH key files“, browse, and select the public key file generated in the first step, then click the “Save Changes” button.
Note: Cluster status will be changed to “UPDATING” for around 10 minutes. The cluster will stay available (no downtime).
7. Test SSH to VM Cluster.
- Connect to SSH Terminal
- Run SSH Command “ssh -i <SSH private key file> opc@<ExaCC VM cluster node IP>“
You are connected now to opc user on the Cluster Node!