Oracle Identity Cloud Service (IDCS) provides integration with any service that can be integrated via SAML (Security Access Markup Language) protocol. Administrations will be able to manage users in various applications via a single control panel and end users will be able to get to applications via single click.
IDCS provides support for standard SAML 2.0 browser POST login & logout profiles.
In this blog, I will set up integration with Salesforce using SAML. IDCS will act as IdP (Identity Provider) and Salesforce org as SP (Service Provider also known as a Relying Party)
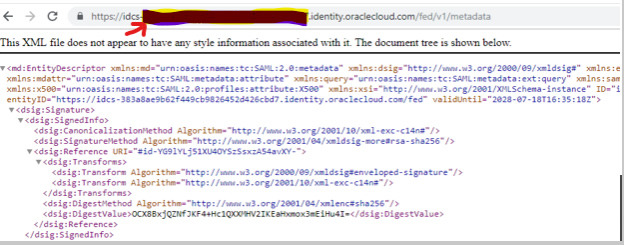
1. Download and save IDCS Metadata to a local XML file for your instance. Metadata is available from the following locations:
https://idcs-xxxxxx.identity.oraclecloud.com/fed/v1/metadata
where idcs-xxxxxx is your IDCS tenant name that you can grab from the browser URL of your IDCS console. Copy-paste the constructed URL on a new browser tab and save the XML file locally named IDCSMetadata.xml
2. Now log in to the Salesforce Developer Account. Click on the setup page.
3. From the side menu bar, go to Settings -> Identity -> Single Sign-On Settings
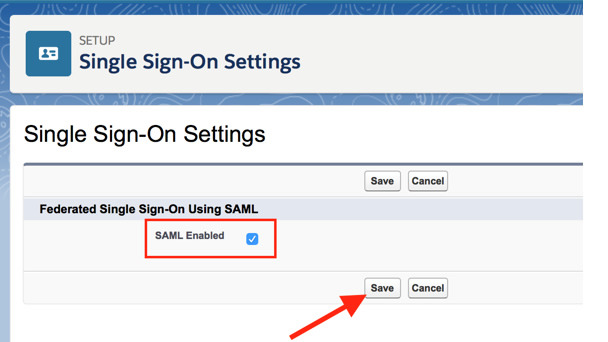
4. Click on Edit and enable Federated Single Sign-On Using SAML option. Click on Save.
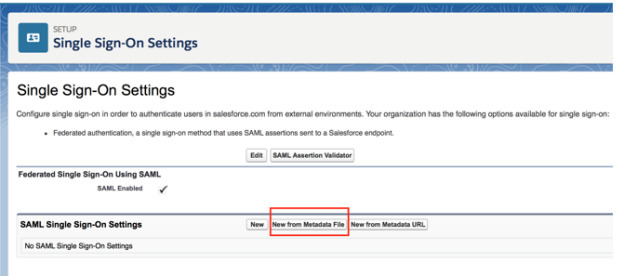
5. Click on the New from Metadata File button to import IDCS metadata.
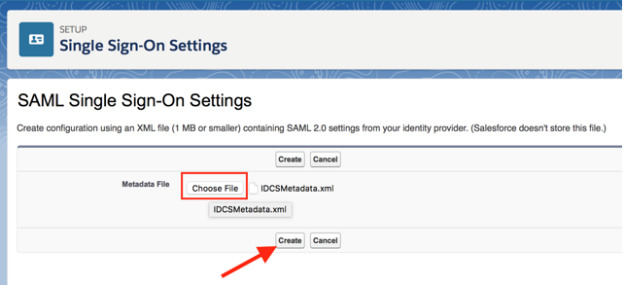
6. Select the downloaded metadata XML file (created in step 1) using the Choose File button. Click on Create.
7. Keep all the default information and click on Save
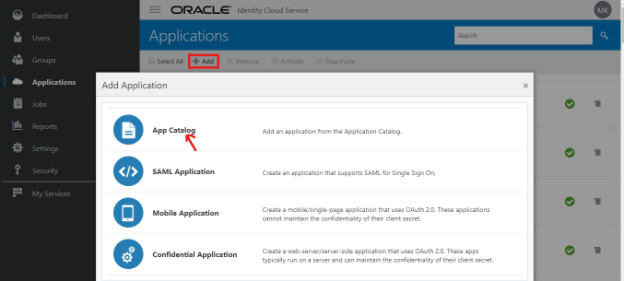
8. Now go to Oracle Cloud IDCS admin console -> Applications menu
9. On the Applications page, click on Add and select App Catalog on the pop-up.
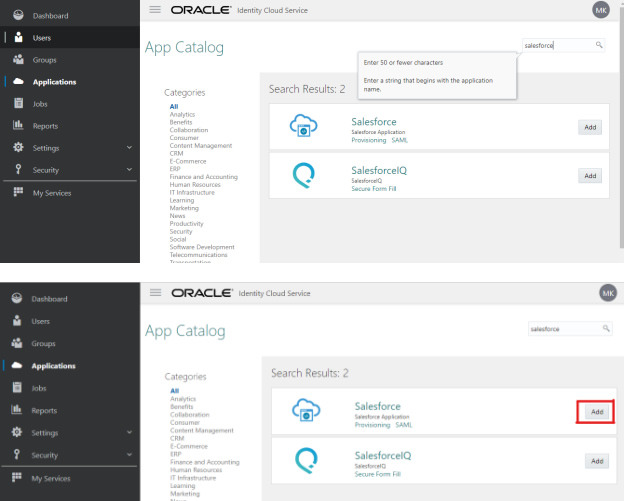
10. Search for the Salesforce app and click on Add
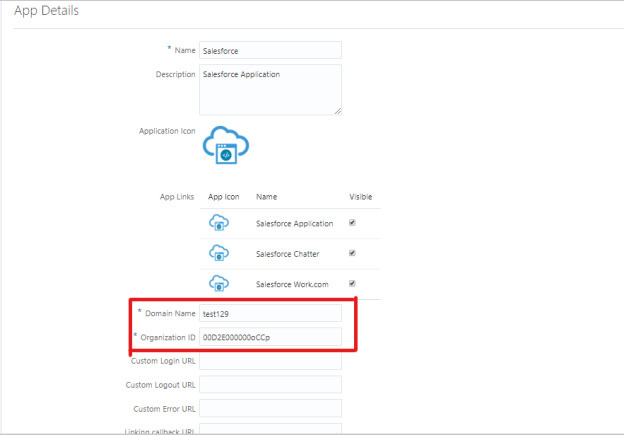
11. On the first page of the configuration screen enter the Organization ID and Domain Name values. Then click on Next.
NOTE: These values are exactly the same as those found in the IDCS settings in Salesforce I just configured in step 7.
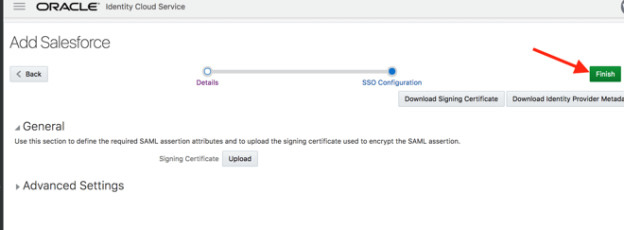
12. Click on the Finish button
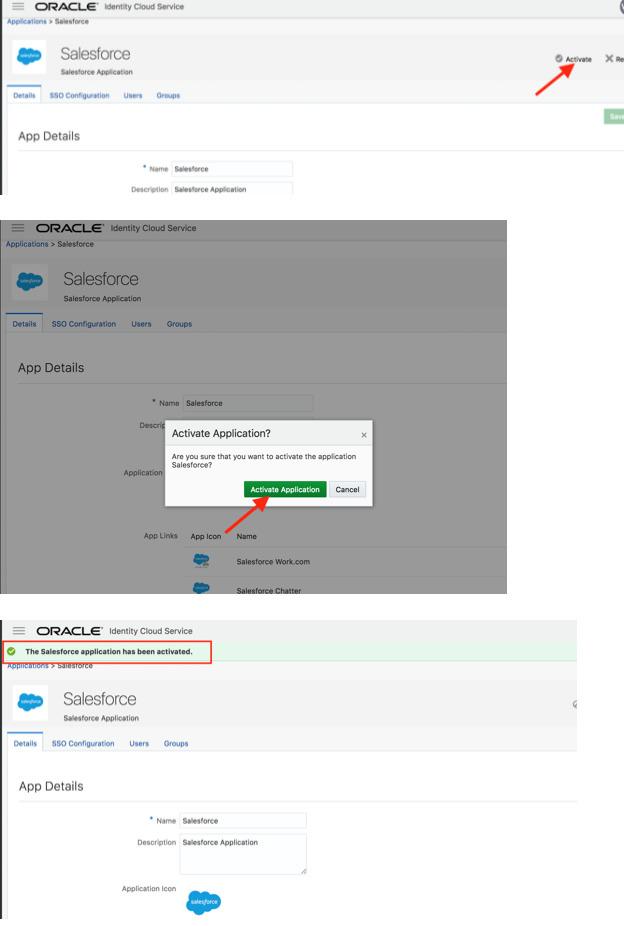
13. Activate the application
14. So, we successfully added and activated an application in IDCS.
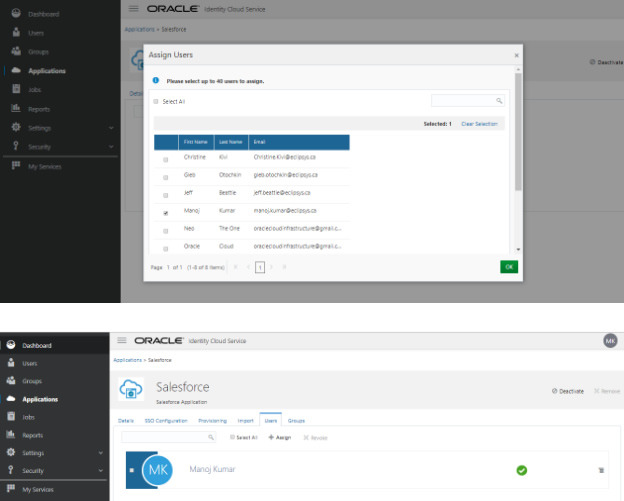
15. Now we need to grant this app to a user or group to use it.
16. I am going to grant this app to a user.
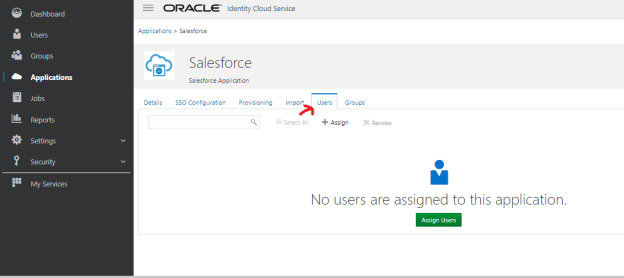
17. Click on the Application select the Salesforce app and click on the users tab.
18. Click on Assign users and select the user and click Ok
19. Now Go to My Apps section from menu located top-right.
20. Ensure that Salesforce applications are visible now on the My Apps page.
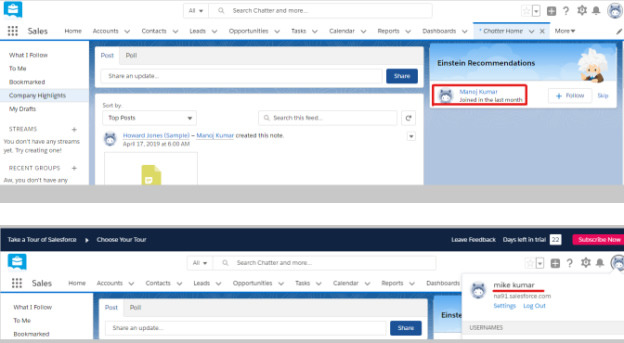
21. Verify SSO now by clicking on the Salesforce Chatter app.
22. Ensure that user is automatically logged-in to Salesforce Chatter (SSO)
Congratulations, We completed the SSO for a Salesforce app from Oracle Cloud.