Prerequisites
1. Backup File: Ensure you have a valid full backup of the database you want to restore. I used AdventureWorks2019.bak for my test.
2. Availability Group Configuration: Ensure the SQL Server instances are configured in an Always On Availability Group.

3. Permissions: Ensure you have the necessary permissions to perform the restore operations.
Steps to Restore the Database
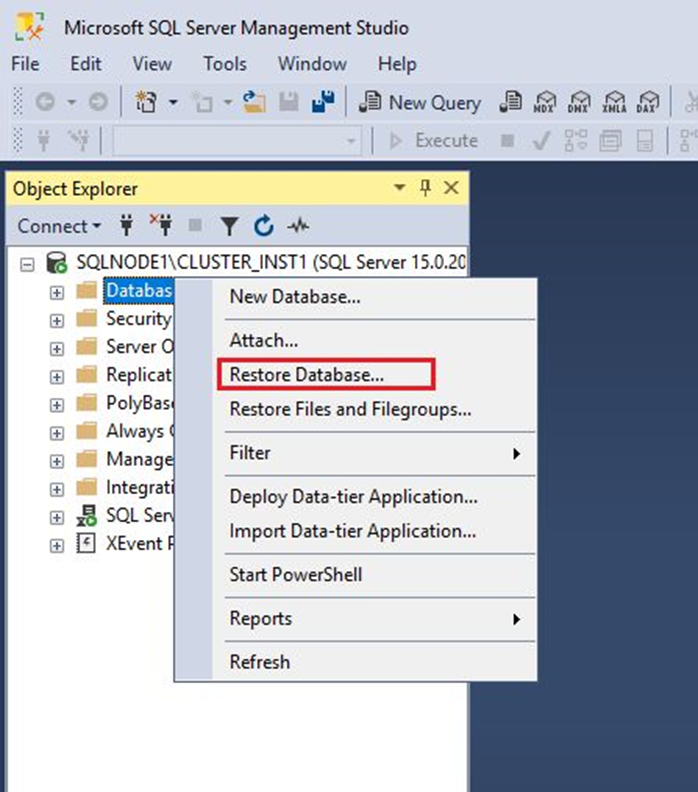
1. Restore the Database on the Primary Replica: First connect to the Primary Replica using SSMS, then right-click on the databases and click Restore Database
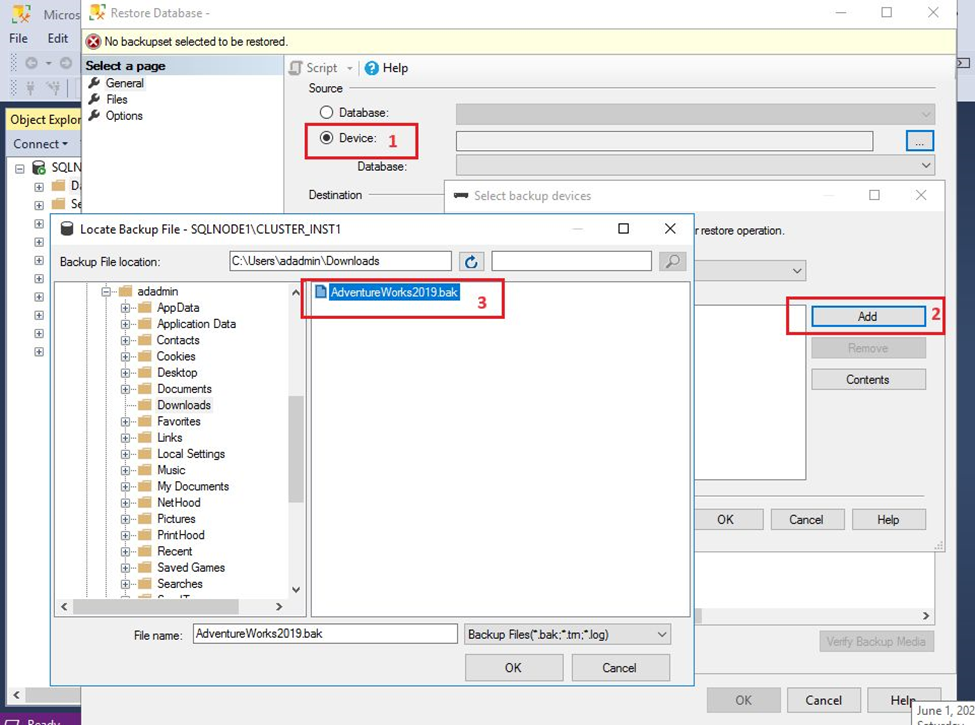
Then select the backup file for doing the restore operation.
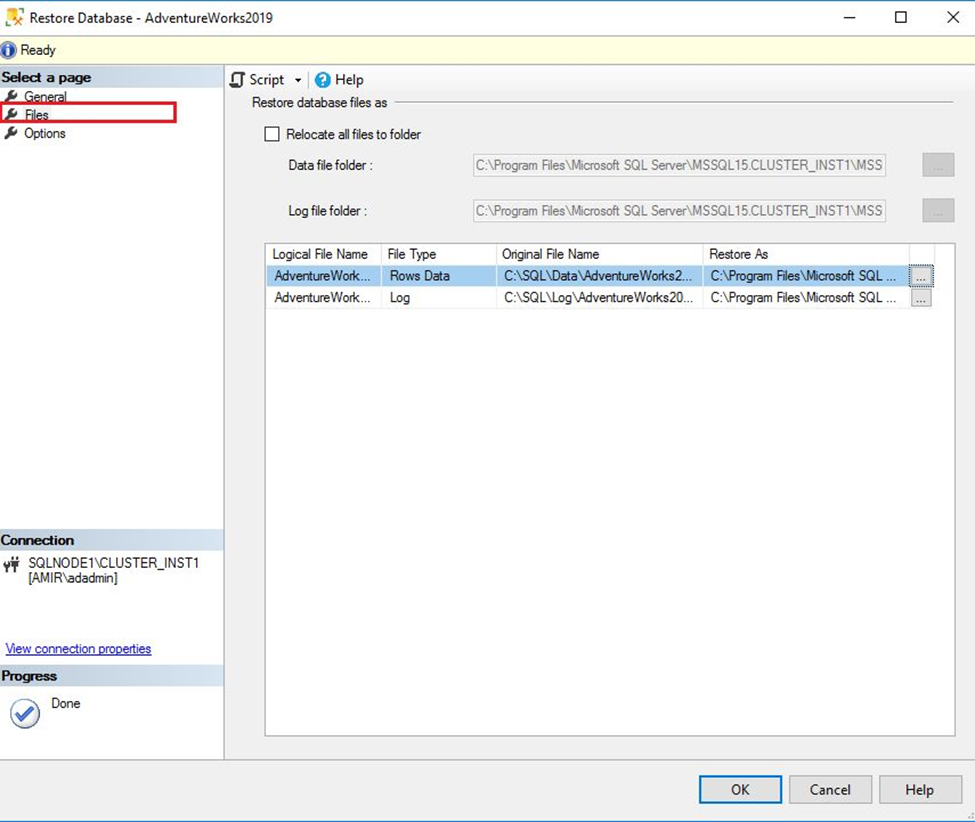
If you want to relocate the restored file to another path use the File tab in the restore database.
In the options select “RESTORE WITH RECOVERY”
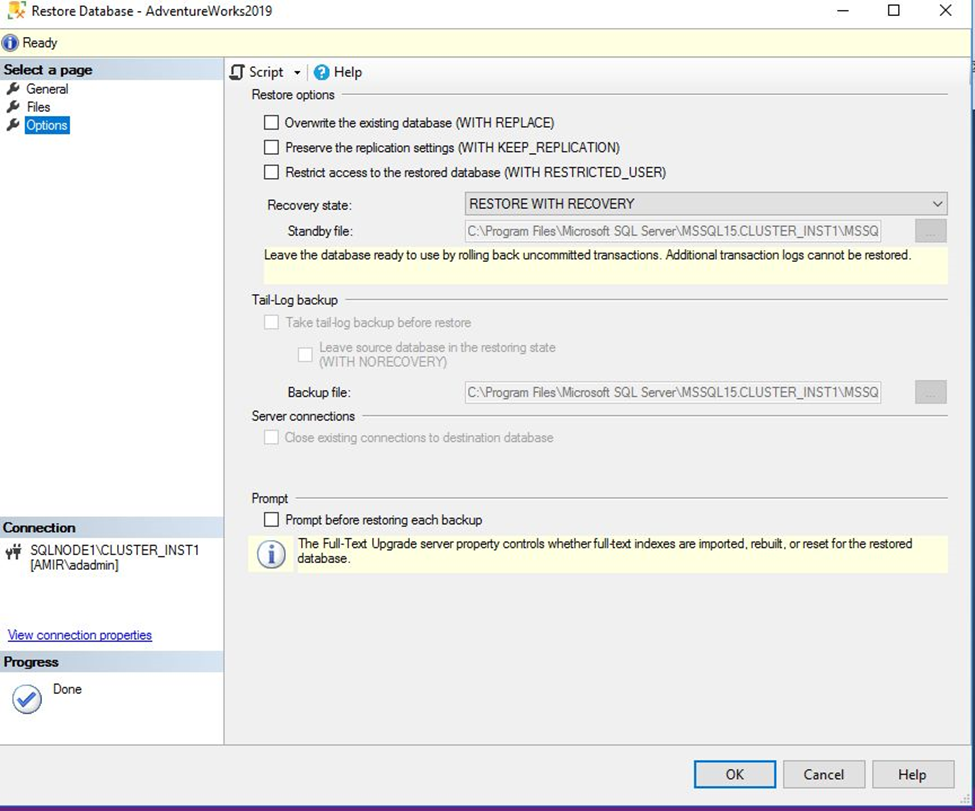
Click “OK”
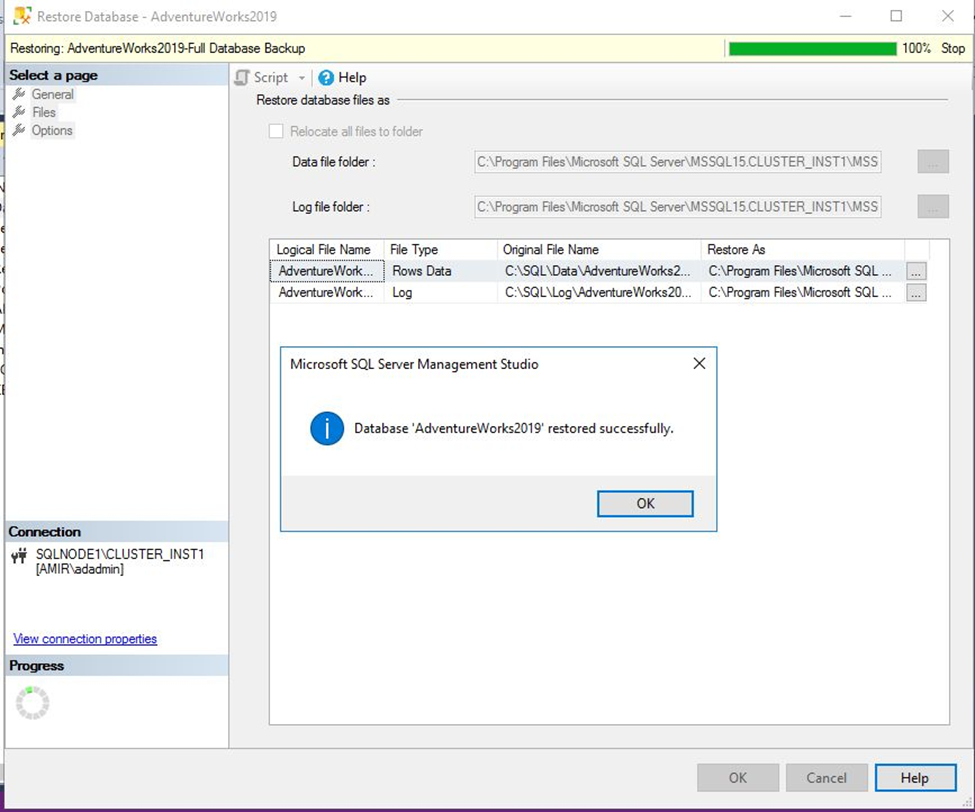
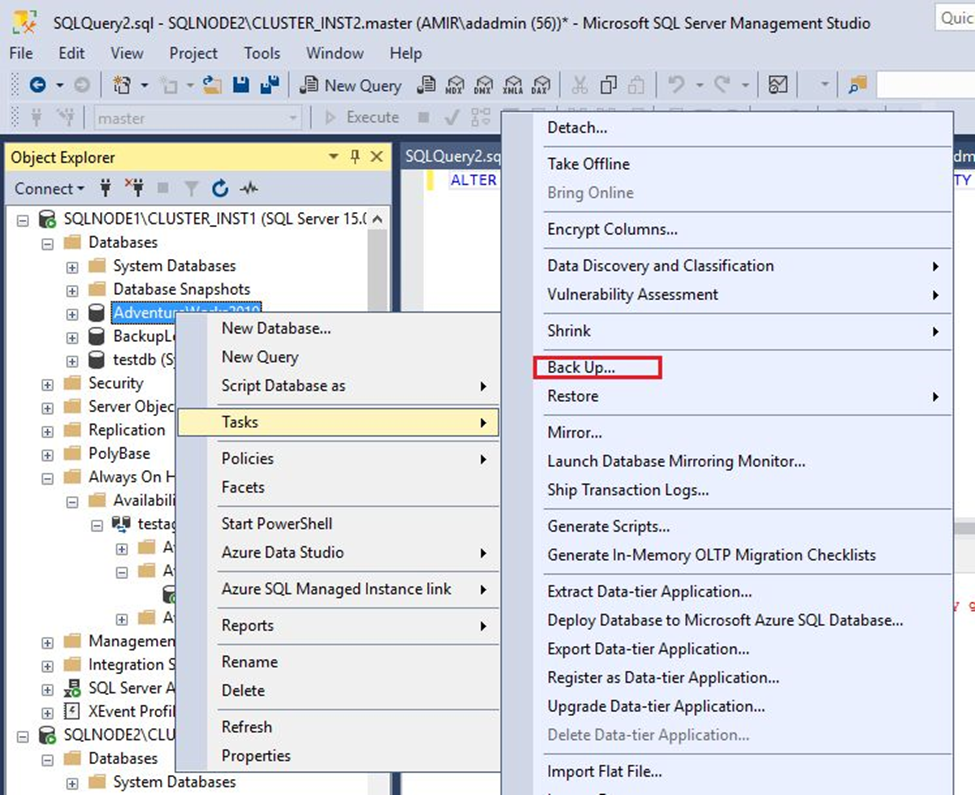
2. Take a full backup from this restored database in the primary replica: Right-click on the database AdventureWorks2019 => Task => Back Up
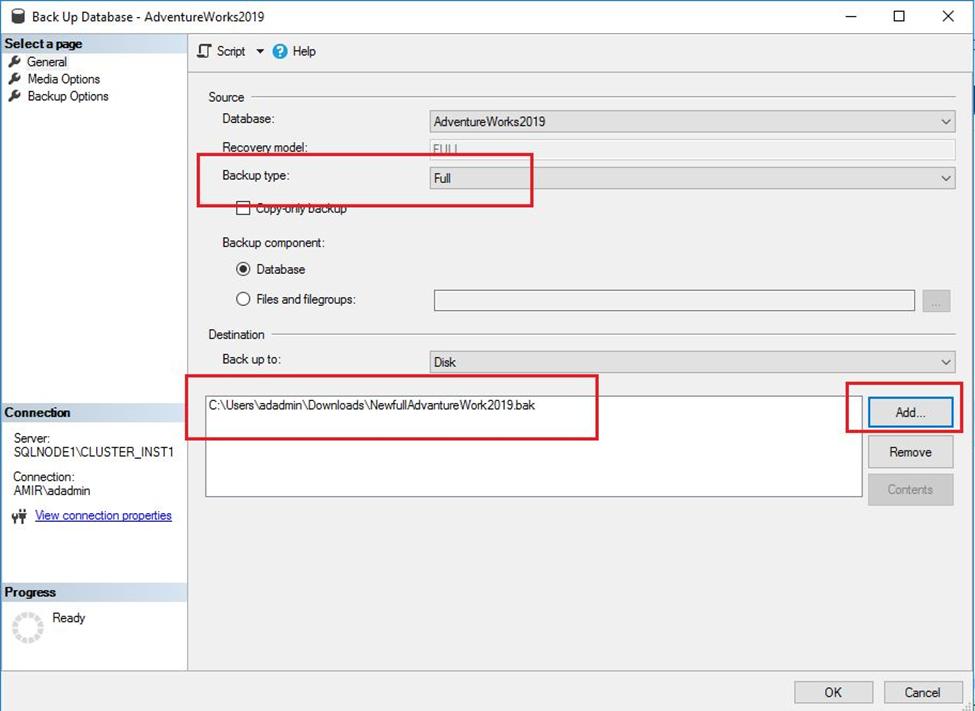
Select the Full backup type, specify the path for the backup file, and click “OK.”
3. Take Transaction Log backup from the Primary Database: Right-click on the database AdventureWorks2019 => Task => Back Up
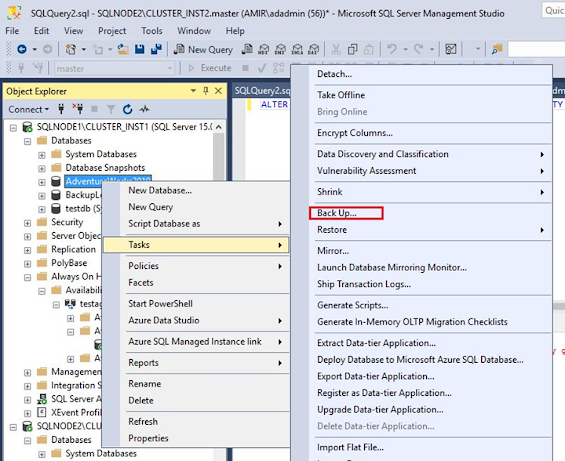
Select the Transaction log backup type, specify the path for the backup file, and click “OK.”
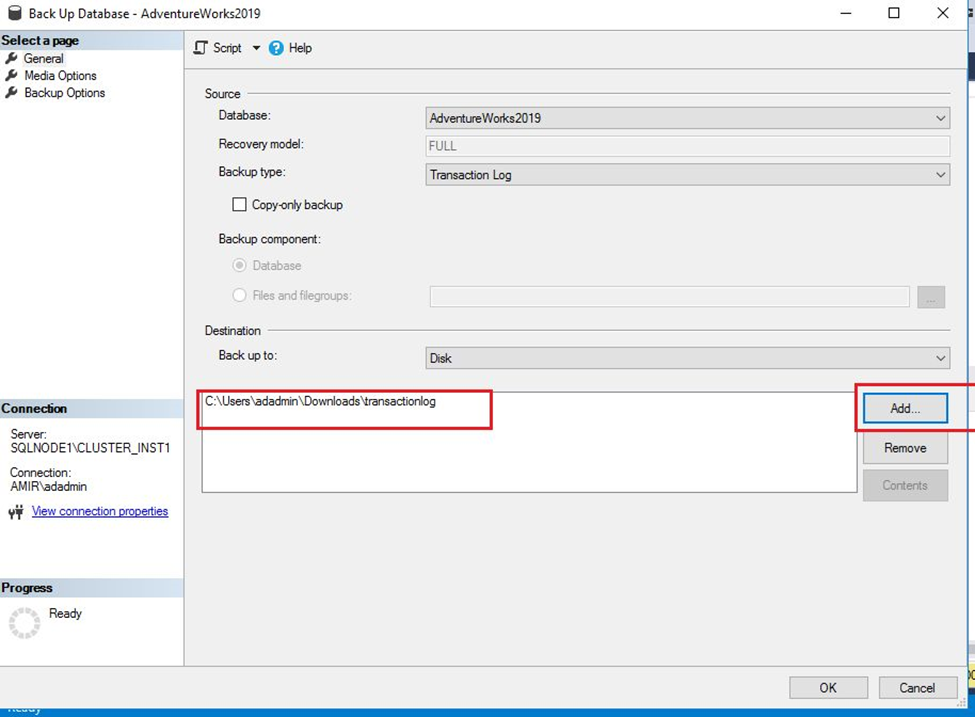
Now, we have the following files and should copy them to the Secondary Replica.

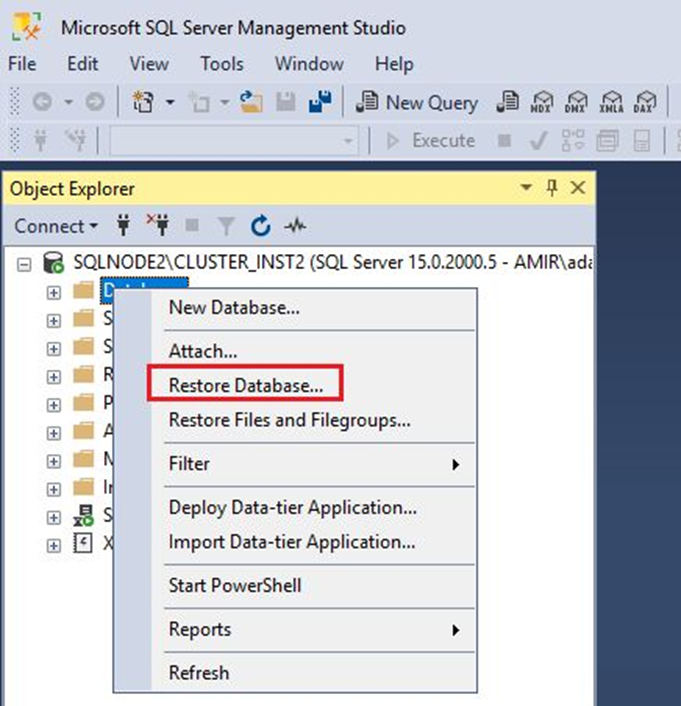
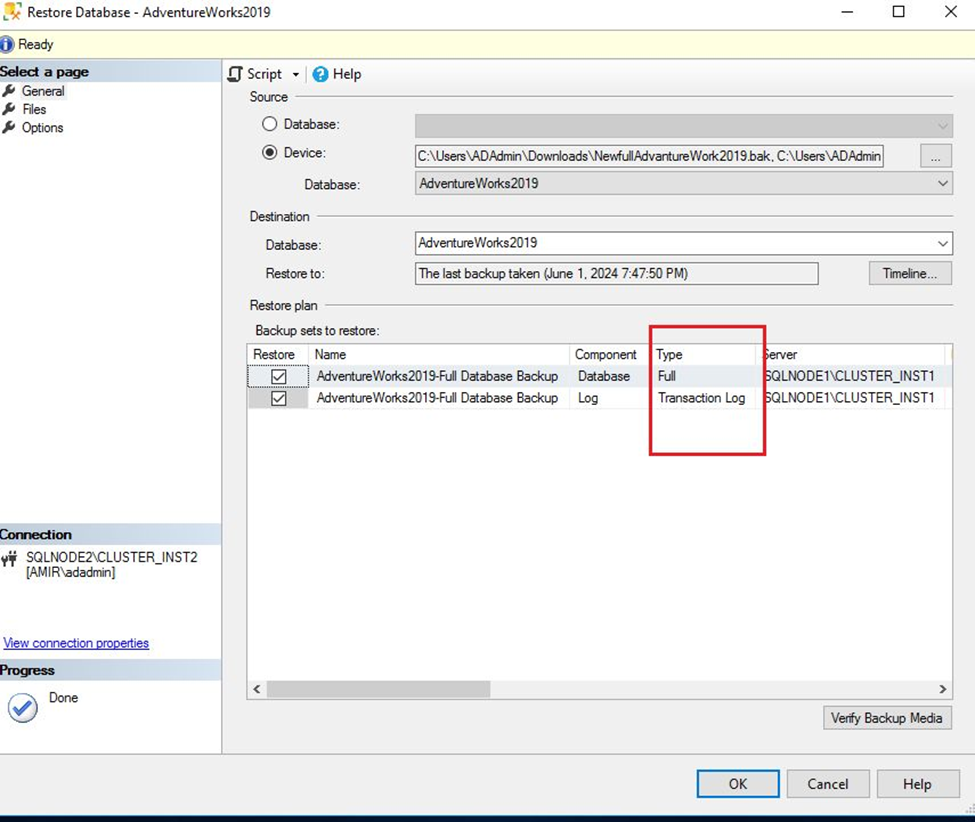
4. Restore all the backups (Full and Transaction Log) in the Secondary Replica: Right-click on the databases and choose Restore Database
Select both files (Full and Transaction Log) for doing the restore operation
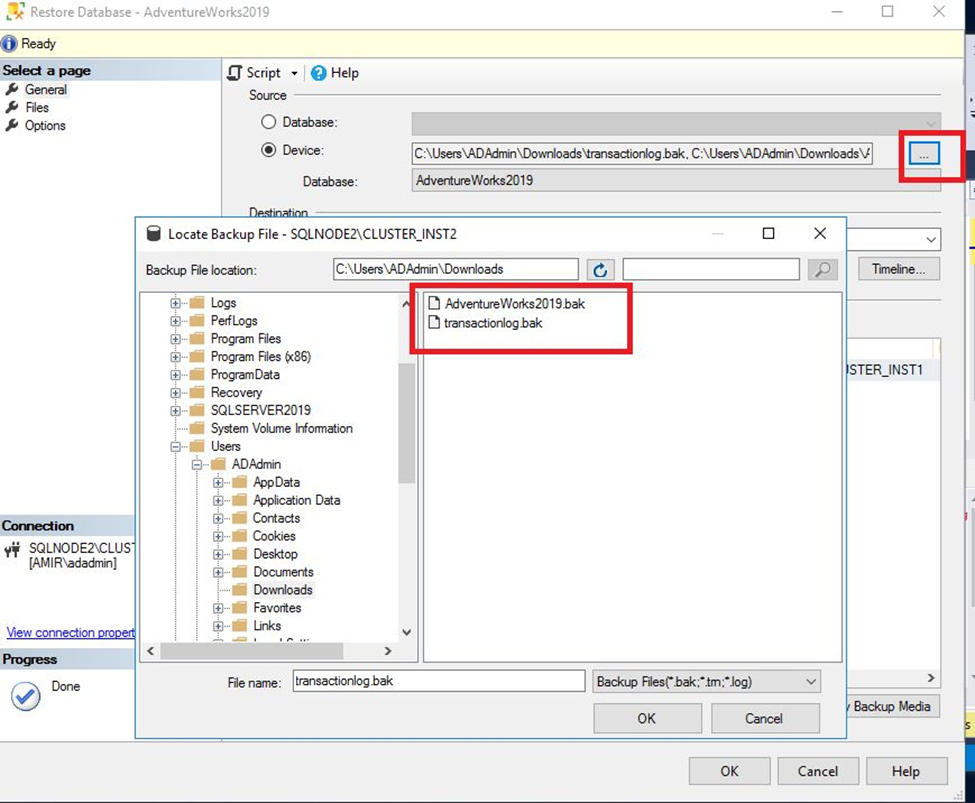
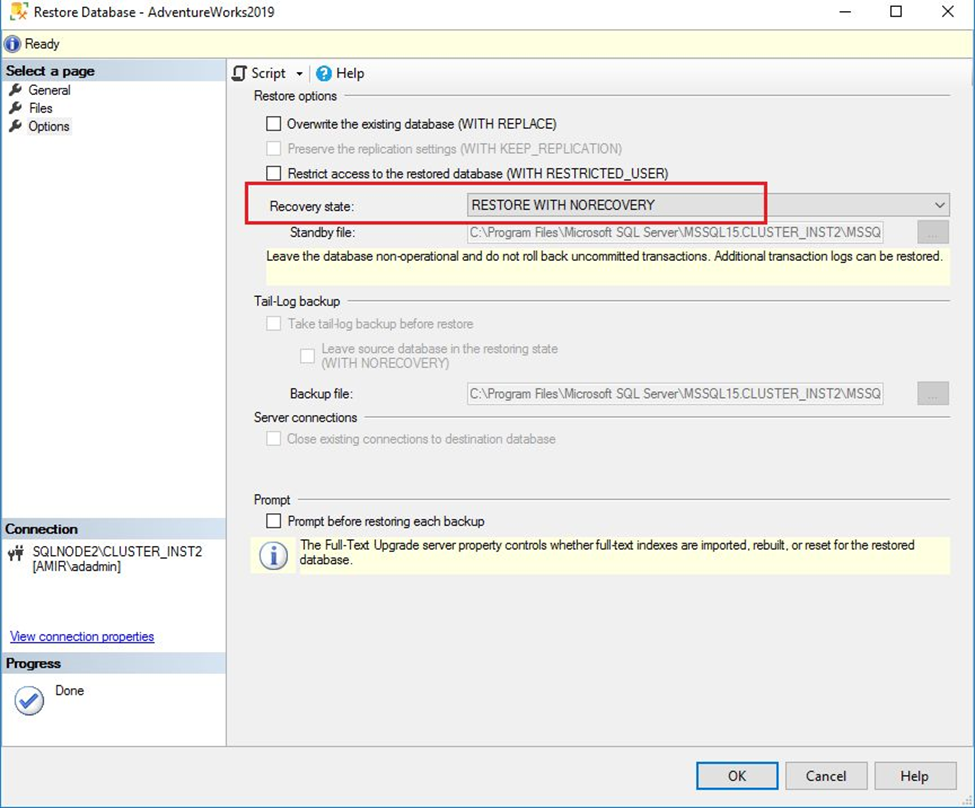
NOTE: In the secondary replica you must “RESTORE WITH NORECOVERY” to put your database in a recovery state for adding it to the availability group.
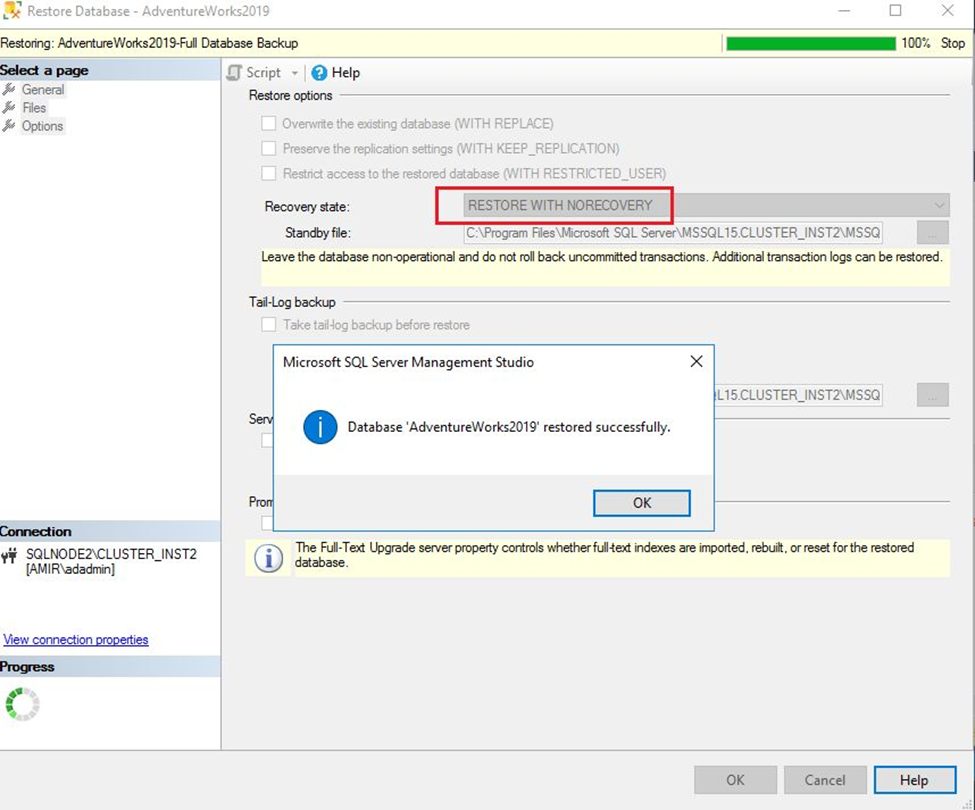
Click “OK”
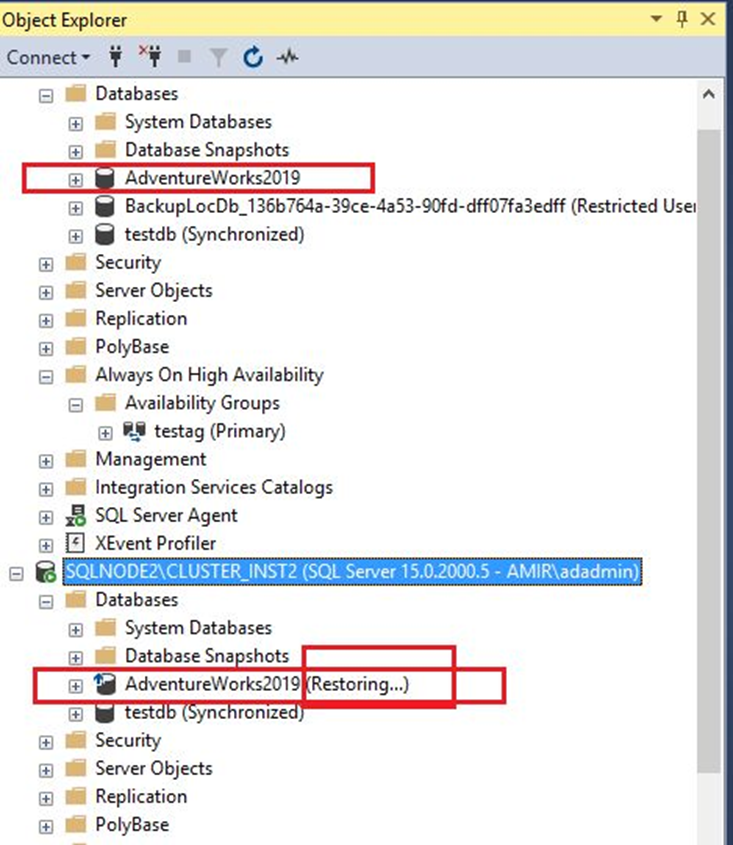
Now if we connect to the secondary replica we can see that the AdventureWorks2019 database is restored.
5. Adding the Database to the Availability Group: Once the restore is complete on the primary and secondary replicas, we can add the database to the Availability Group.
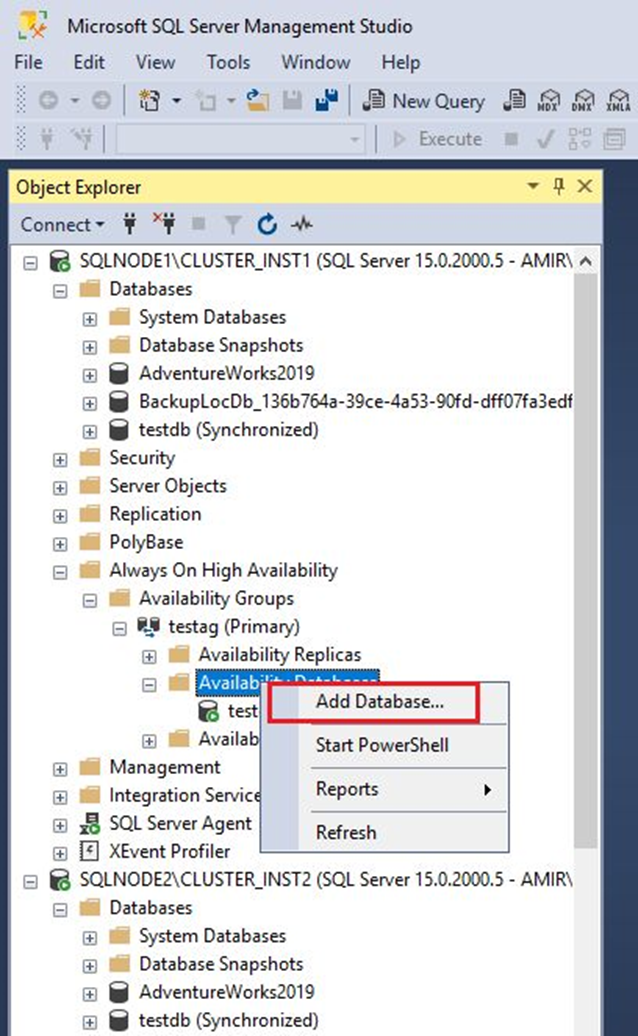
In the primary replica right-click on the Availability Database => Add Database.
Now, you can see that we cannot add the AdventureWorks2019 to the Availability databases because the database is not in the Full Recovery Model.
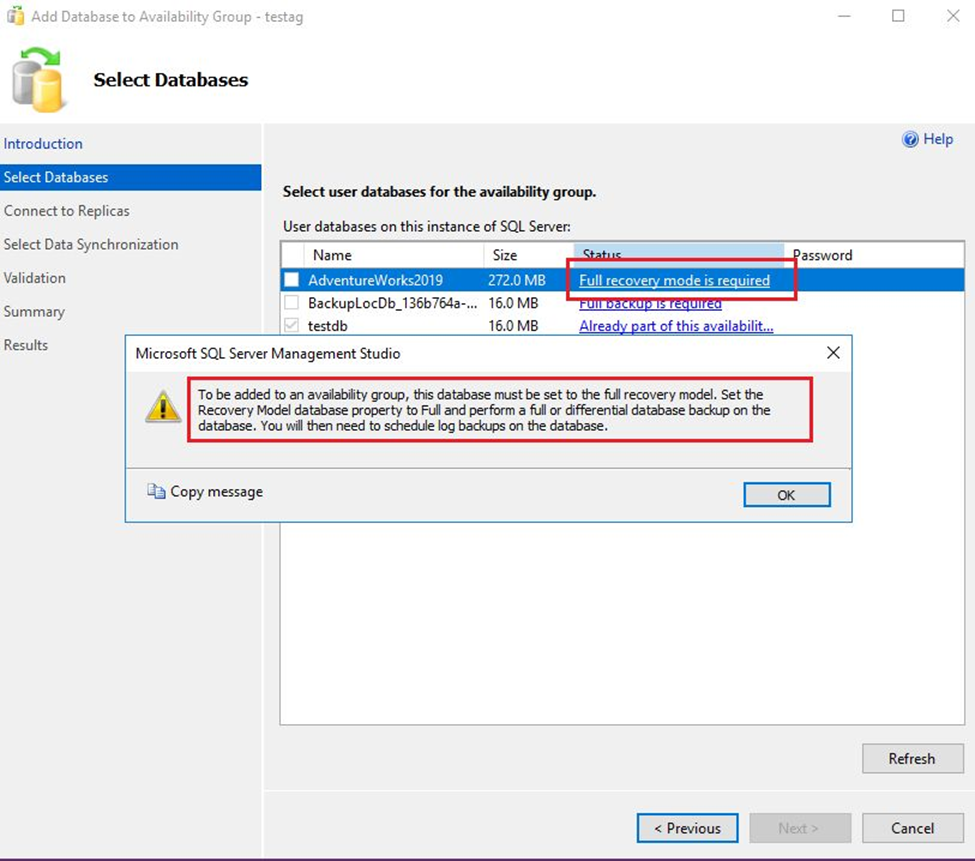
Therefore, we must put the database (on primary replica) in full recovery mode.
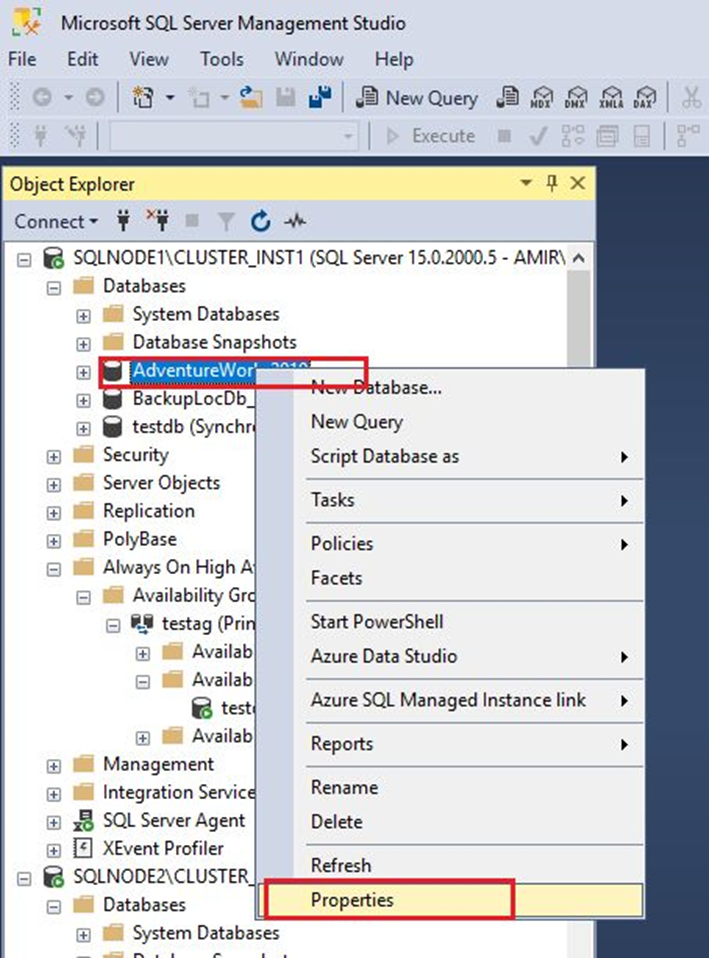
Right-click on the AdventureWorks2019 database and select the properties.
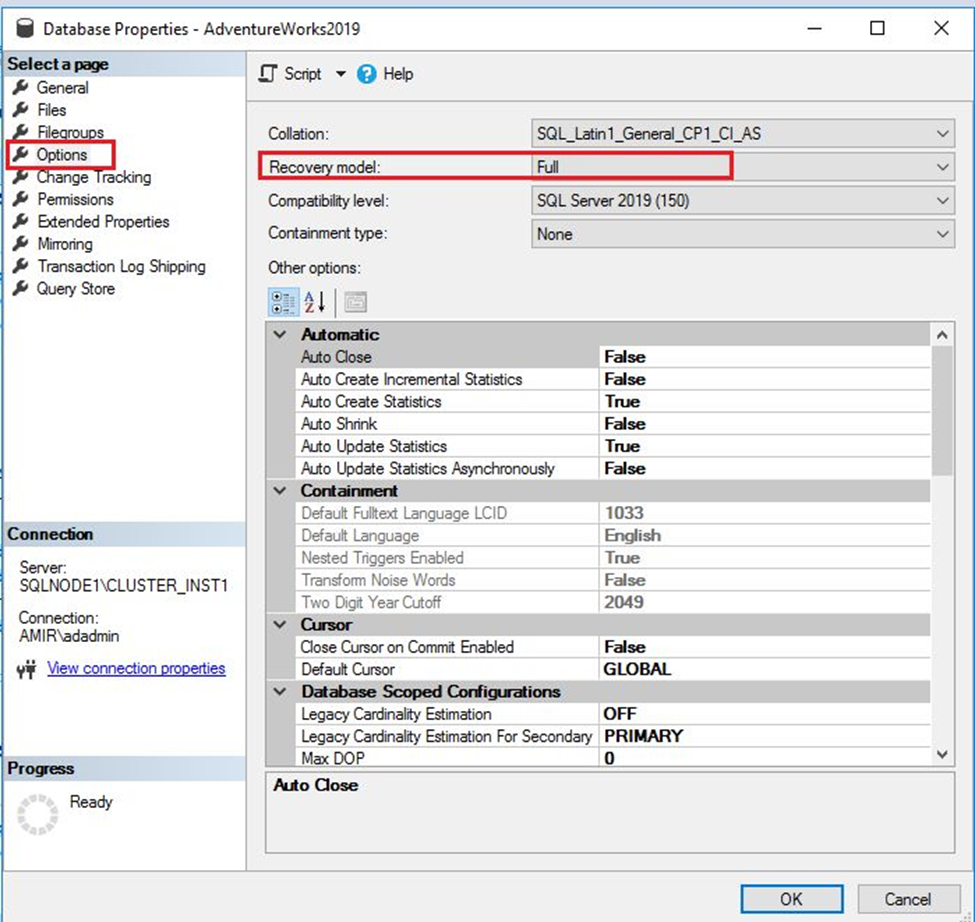
Go to options and change Recovery Model to Full.
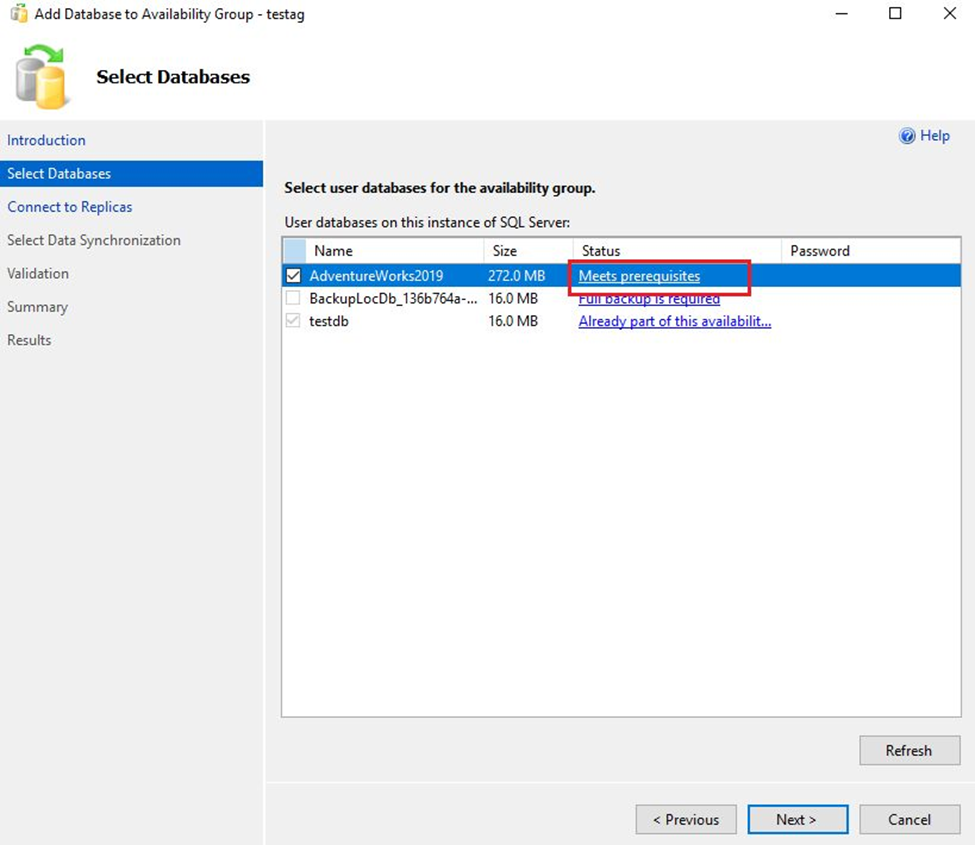
Now we can add this DB to the Availability Group
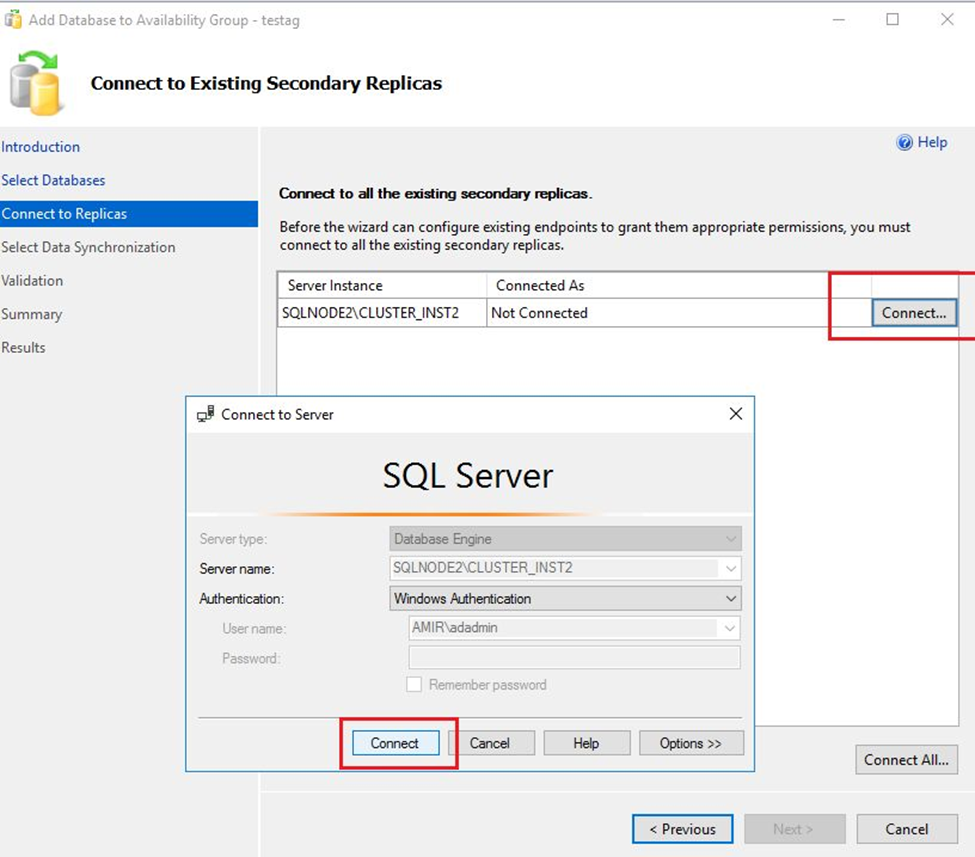
Connect to the Second Node
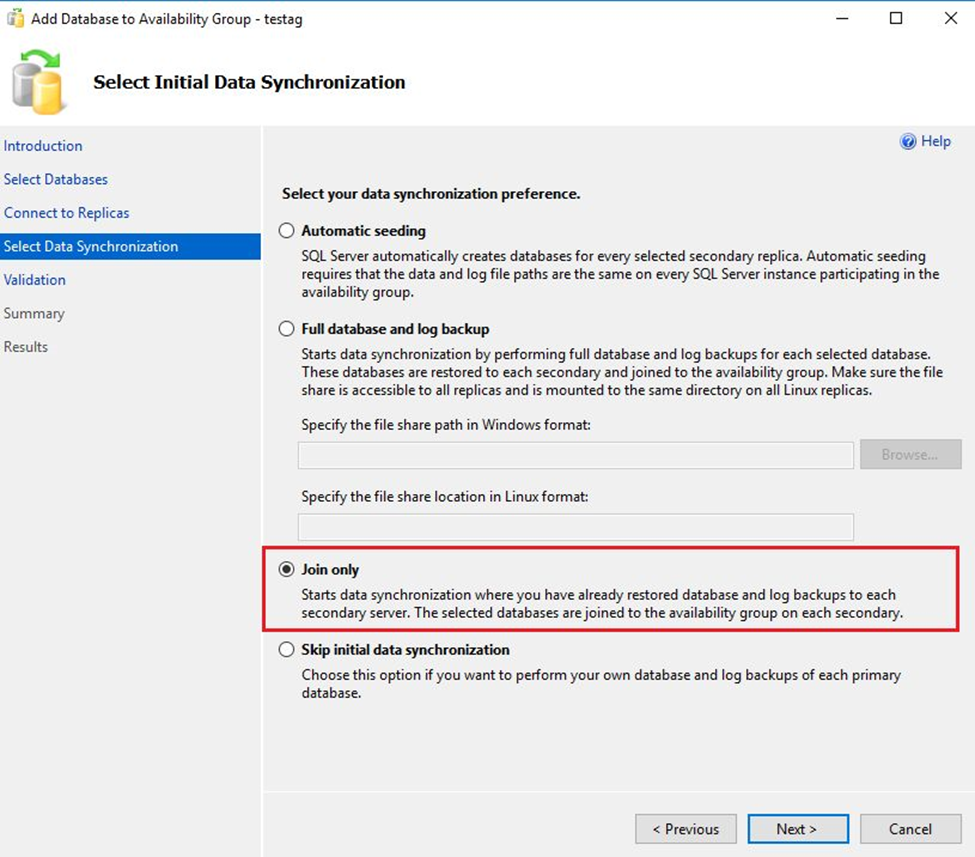
Because we already restored the database on other replicas, I selected the join-only option.
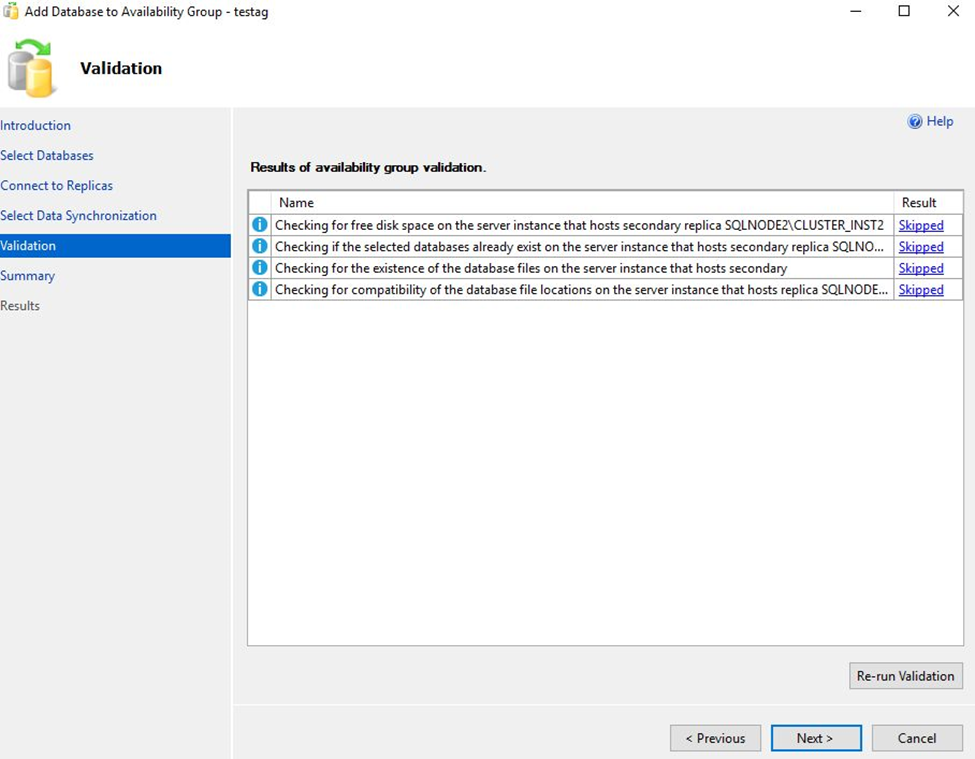
Click “Next”
Click “Finish”
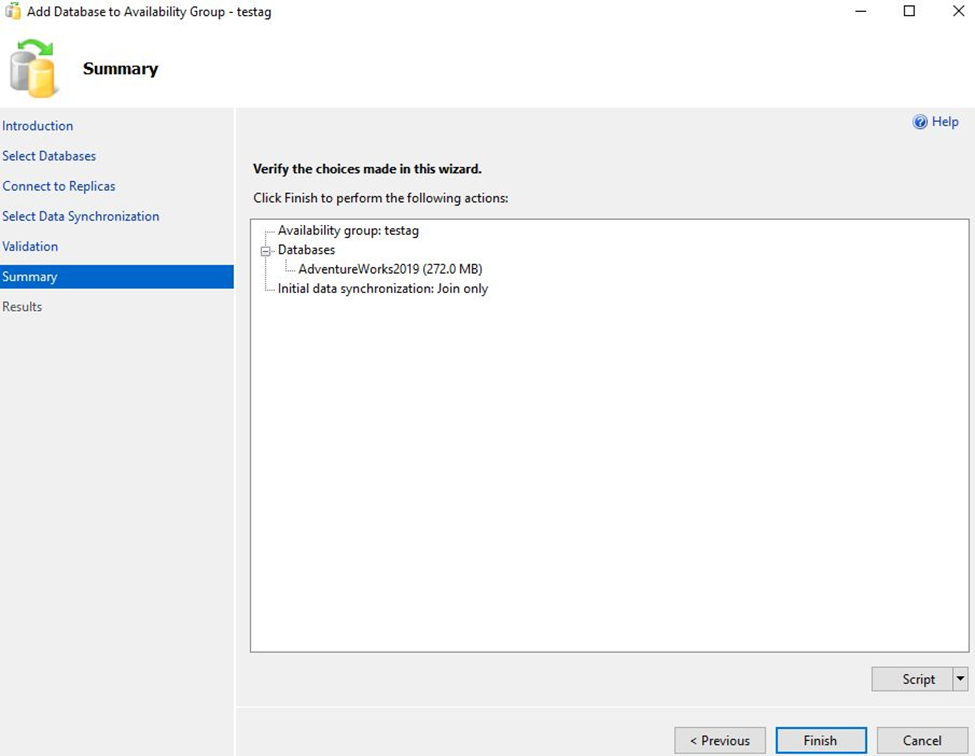
Click “Close”
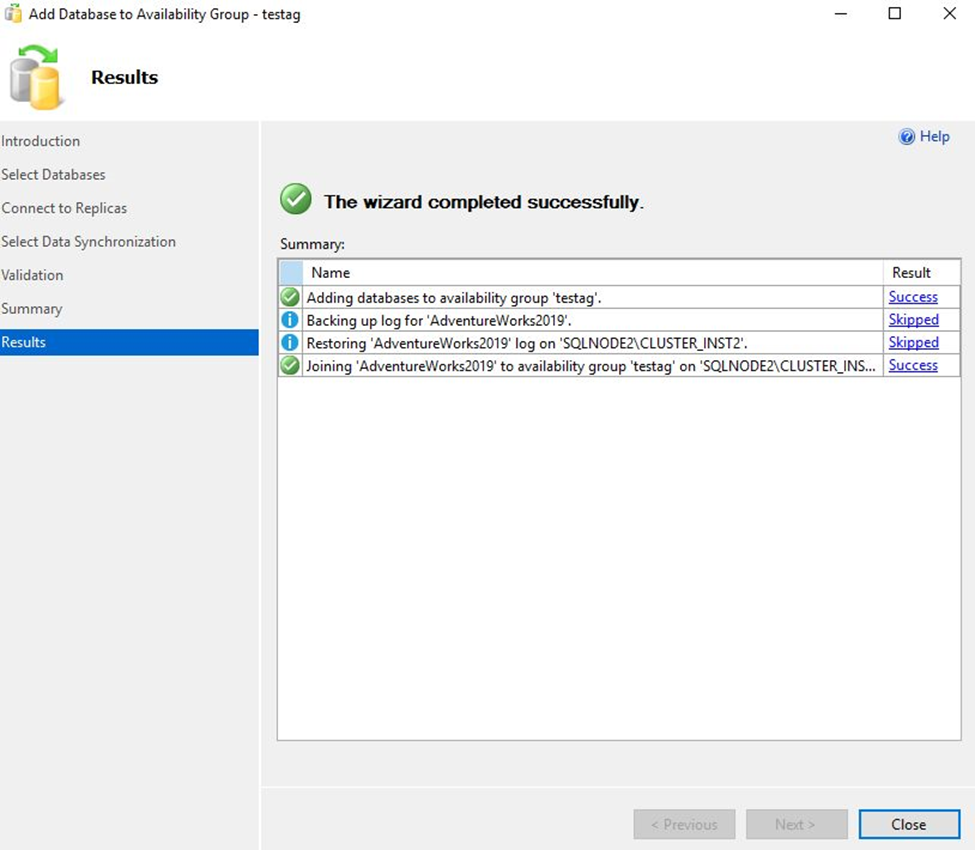
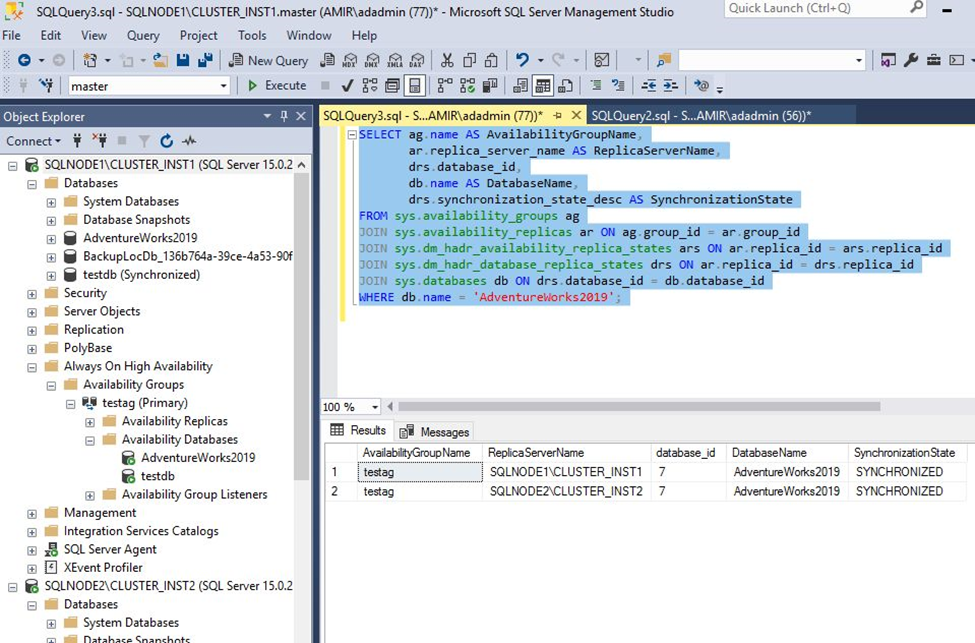
6. Verify the Database Synchronization: Check the synchronization state of the database on all replicas to ensure everything is working correctly.
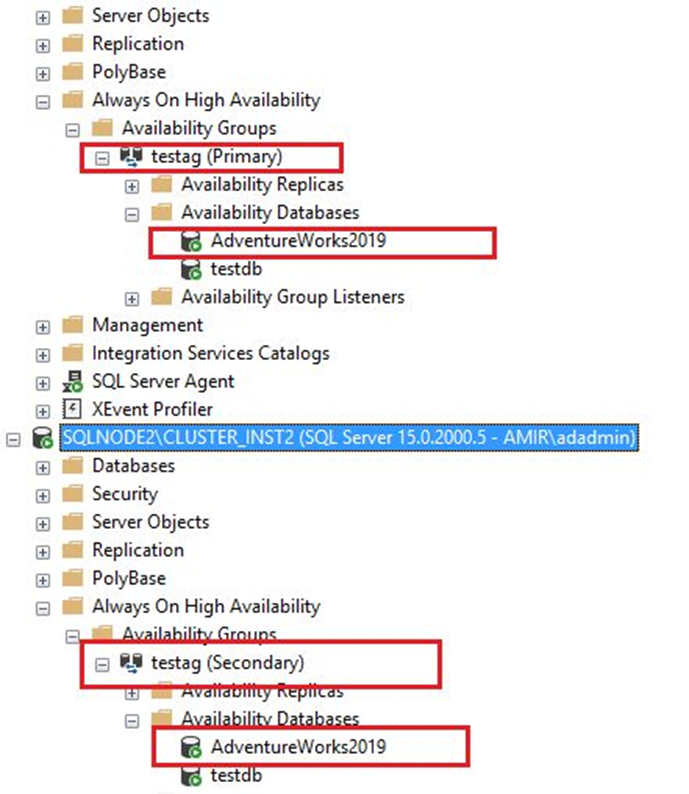
You can see that this database exists in both primary and secondary replica availability databases.
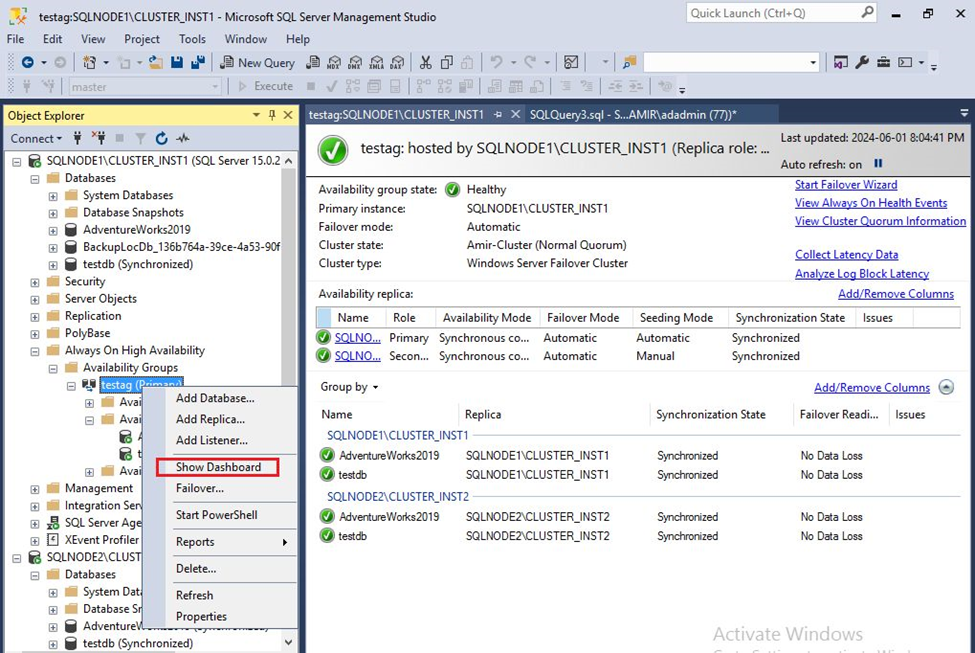
TO Verify the Database Synchronization you can right-click on the availability group and select Show Dashboard.
OR you can use the following query.
SELECT ag.name AS AvailabilityGroupName,
       ar.replica_server_name AS ReplicaServerName,
       drs.database_id,
       db.name AS DatabaseName,
       drs.synchronization_state_desc AS SynchronizationState
FROM sys.availability_groups ag
JOIN sys.availability_replicas ar ON ag.group_id = ar.group_id
JOIN sys.dm_hadr_availability_replica_states ars ON ar.replica_id = ars.replica_id
JOIN sys.dm_hadr_database_replica_states drs ON ar.replica_id = drs.replica_id
JOIN sys.databases db ON drs.database_id = db.database_id
WHERE db.name = 'AdventureWorks2019';
