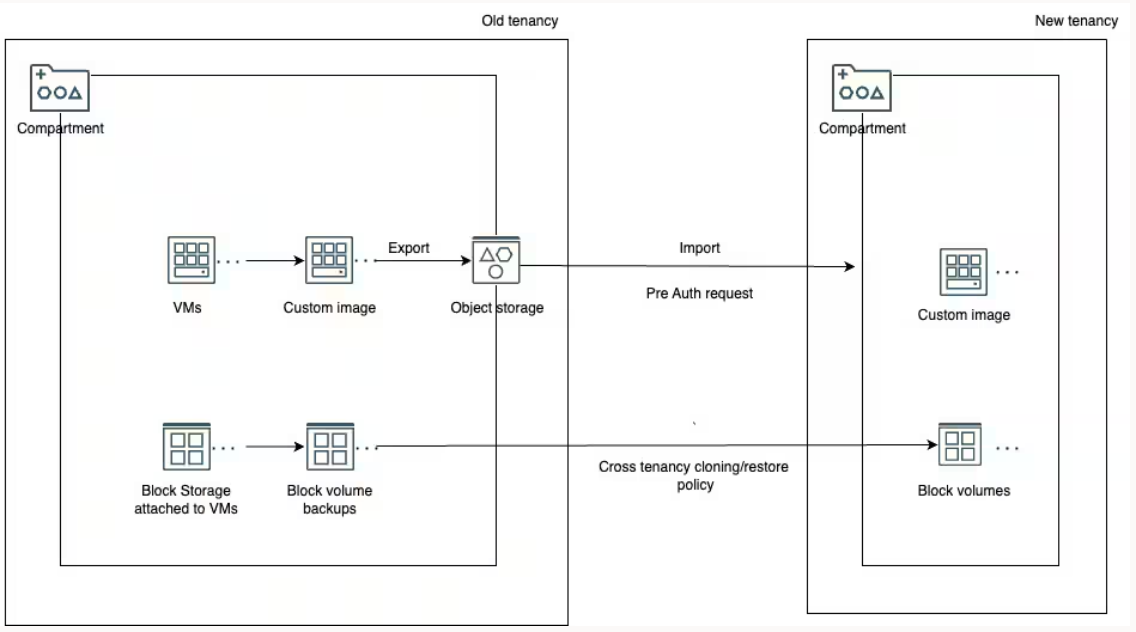
In this blog post, I will show you how we can Migrate OCI Compute Instance from one tenancy to another tenancy. Both tenancies should be in the same region US East (Ashburn).
Pre-requisite:
- We should have access to both Tenancies
- Object storage bucket must exist in the source Tenancy
- You must have predefined policies to restore the backups across Tenancies
Steps:
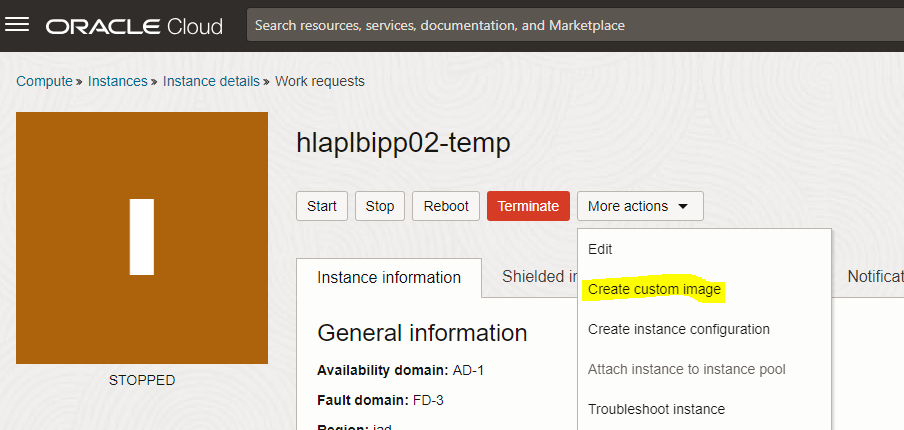
1. Stop the source VM go to More Actions and click on Create Custom Image
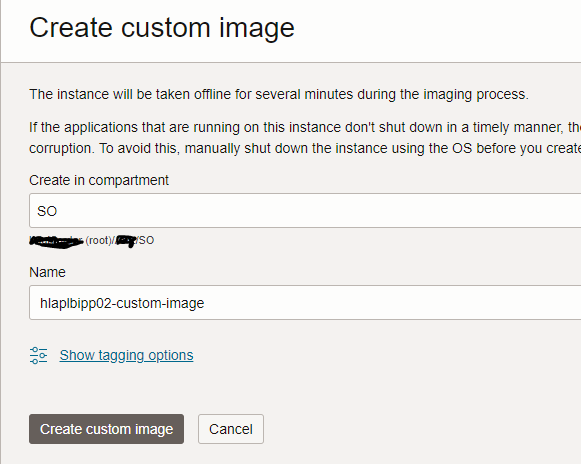
2. Name the custom image and click the Create a Custom Image
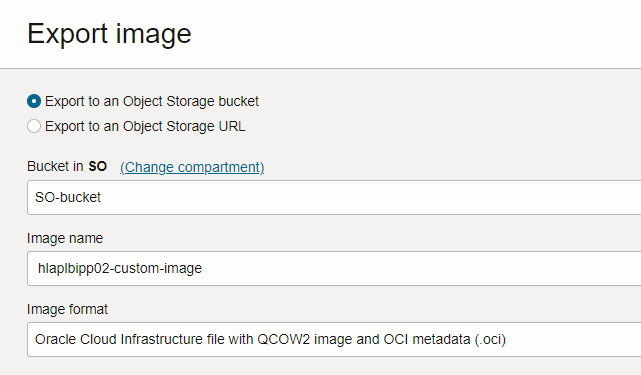
3. Now export the Image to the storage bucket.
Once Custom Image is created, Go to compute –> Custom Images and click on the newly created custom image –> click on Export
and provide bucket name, image name, and format and click export Image
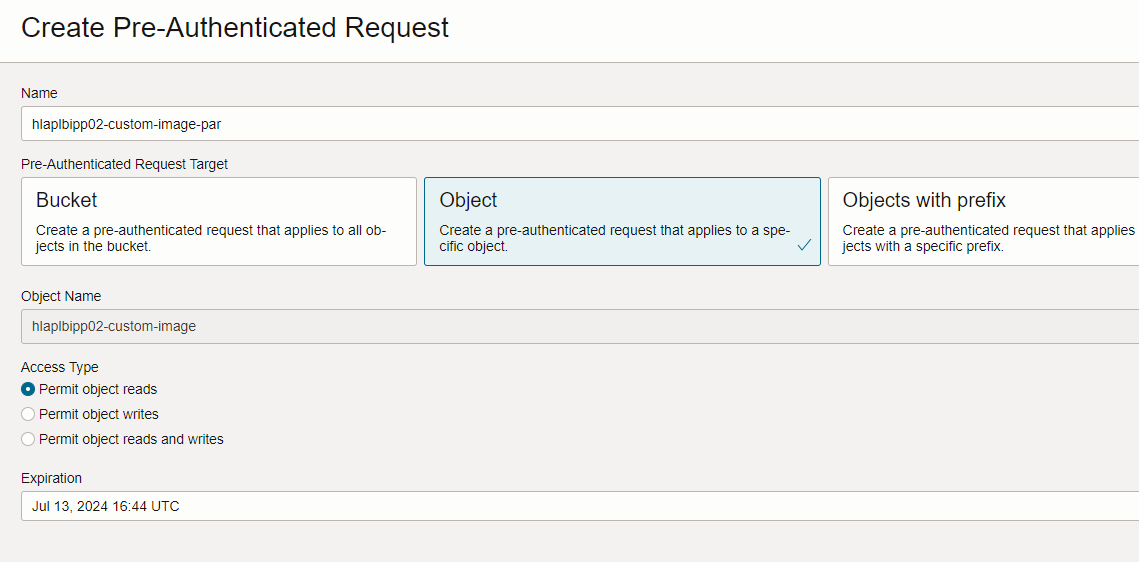
4. Create Pre-Authenticated Request
Go to the bucket where we exported the custom Image. Storage –> bucket -> click on the bucket name
Here are resources –> Objects, we can see the Image.
Select the Image click on 3 dots at the end and click on Create Pre-Authenticated Request.
Name the PAR request, choose the object, object name, and access type to “Permit object reads” and create a PAR Request.
5. Now copy the PAR URL which we have to use in Target tenancy.
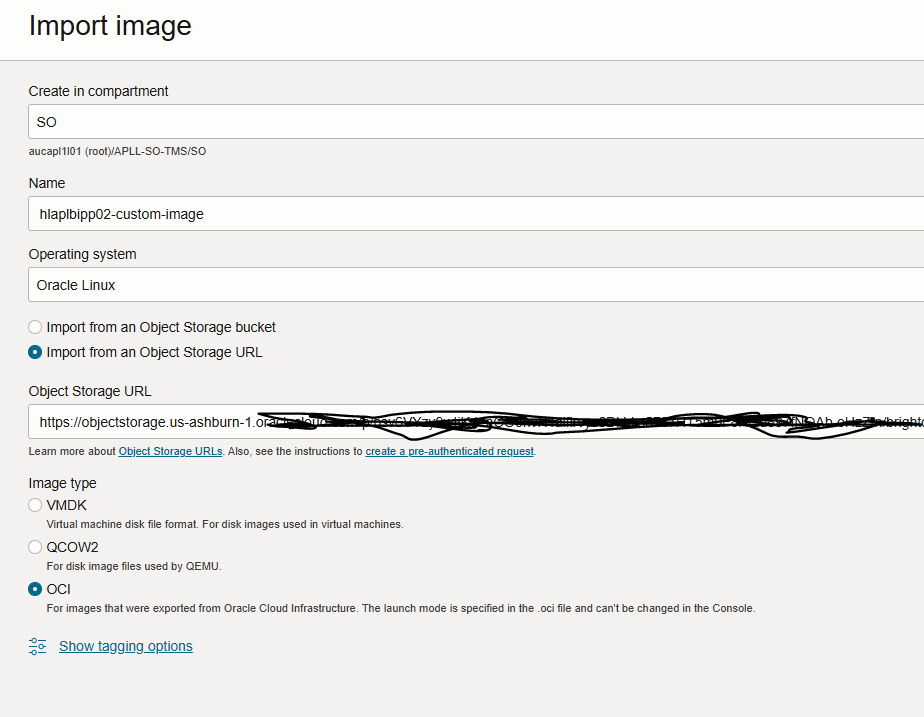
6. Now login to Target Tenancy and go to compute –> custom Image and click import Image
Name the custom Image, choose “Import from an Object Storage URL“
and paste the URL copied in step 5.
Choose Image type = OCI and click on Import Image
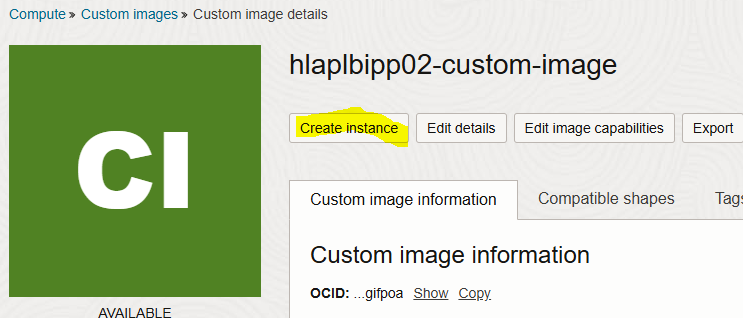
7. Once the Image is imported, we can create a compute instance using that Image.
Click on the imported Image –> click on Create instance
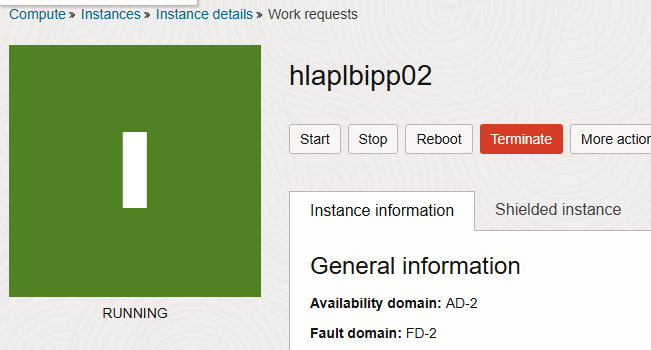
8. Fill in all the details, name, shape, keys, etc., and click Create. It will take a few minutes and the instance will be up in Target tenancy.
So successfully moved our VM to a new Tenancy.
Note: If you have attached block volume on source VM, you need to move that on target tenancy as well.
In my case, I created a new block volume in the target tenancy with the same size attached to the compute instance and then mounted it. Then copy the data from the source mount point to the target mount point using scp.
I will show you how we can mount the attached block volume on the compute instance in my next blog post.